

The plan for this summer was all based around travelling on the cheap out the back of the van. The first roadtrip of the summer however ended abruptly after the van had to be scrapped at the bottom of France as a result of it practically bursting into flames on the autoroute. I was left with a stripped bank account and no wheels. This project was born to get back on the road and on the cheap.
My choice of vans was severly limited by budget anything with a VW badge was well out of my league so the search was for an old Japanese van that from what I have heard are meant to last forever. The only issue was that none were popping up in the pages of autotrader. After a month of looking I got lucky and found one down the road off of Gumtree.com. The van was an electricans well used Mitsubishi L300 with a mere 180,000 miles on the clock. Worrying numbers, but it drived nicely and there was no major rust that needed sorting.
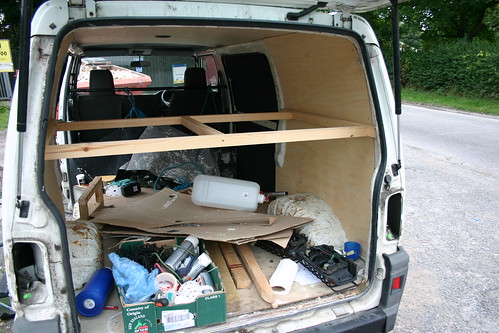
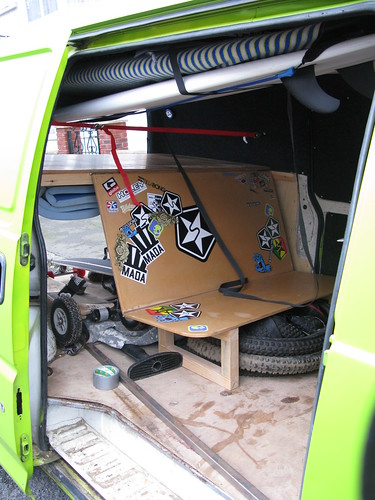
First job was to plyline and carpet the inside. This helps insulate the back which is a must for camping but also helps with deadening the noise and making it look considerably more tidy. The ply was cut to shape and screwed into the pillars using selftapping screws. Any big voids were filled with polystyrene ceiling roll I found in B&Q. Ply was also screwed to the ceiling creating an instant transformation, the inside of the van had almost lost the whole retired builders van look.
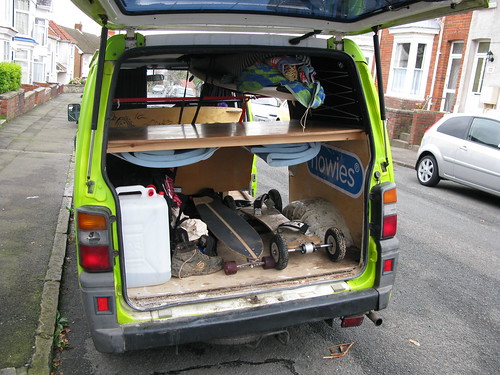
The layout was very difficult to work out. I wanted a sort of 'rock and roll' setup where a seat lifted up to form the bed. Putting any permanent structure in severly limits the useability of the back of the van. As there was not much room to play with it is crucial that bikes and surfboards could still fit in when wanted. As a result the bed had to be very high so that bike wheels could fit underneith and we are still able to load up several bikes. The seat is fully removable and lifts up to hang on metal supports I had made forming the bottom half of the bed. It is also possible to have one fully built bike standing inside the van with the bed up along with loads of room for storage underneith. The advantage with this setup is also that with the seat down muddy/wet gear can be stashed behind the seat in the rear section keeping it fully sepparate from the front living area.
The seat and rear shelf were made out of varnished MDF with a supporting structure made out of 2*2 beams again self-tapped and glued to the side of the van. Once the structure was in place I carpeted the inside. I managed to get the end of a roll of carpet for £10 which was enought to do all the areas in the back I wanted. The carpet had a rubber lining that had to be peeled off first and then it was cut and glued using spray glue to the sides. The edges of the carpet were tucked behind the ply panels giving a crisp pro finnish.
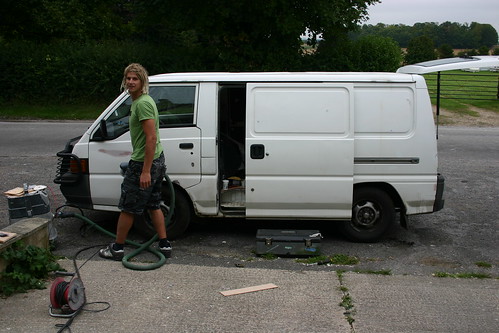
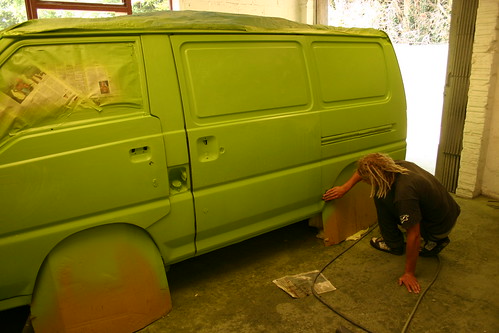
The outside of the van was looking really ropy I wanted to do a full respray. First any major dings were filled and sanded so that the pannels were all nice and flat. the next stage was the hardest part of the job in that all the exterior trim had to be removed or masked. This takes a lot longer than you might imagine!! The van was then fully cleaned using thinners to take off any dirt grease and residues. Followed by a light rub down to key the surface ready for the paint. 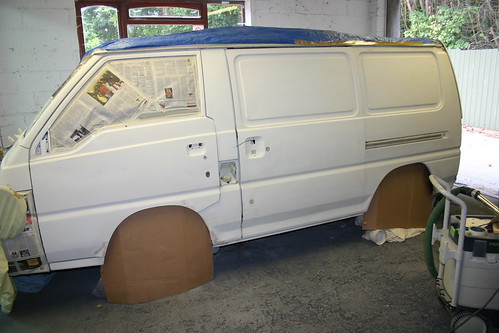

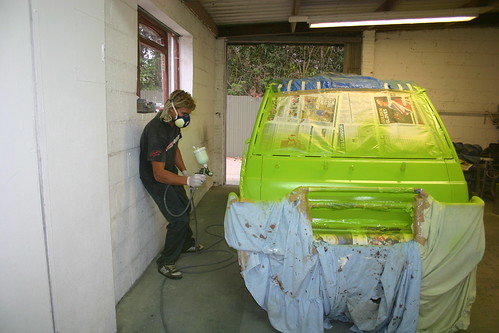

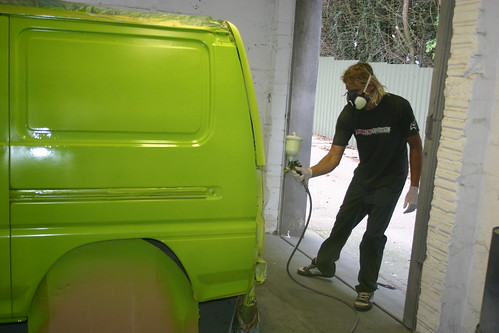
I was lucky enough to be able to borrow a spray room and guns to do the van in. The painting itself was quite a simple process. First a dust coat was added where a very thin speckling of paint is sprayed and let to tack off to give something for the first layer to stick to. Then spraying along the full length of the van at as constant a speed and distance as possible to give an even covering of paint. Getting the right ammount of paint applied on each coat is crucial. Too little and the droplets wont converge together leaving a textured finnish, too much and the paint will run. After 2 coats we had a couple of runs and so left it to set before giving the runs a careful rubdown. The final coat was then applied and left to set. We ended up only getting one small run on the whole van. the finnish of the paint has come out really well. Opening the tin of paint for the first time was a bit scary, the colour was brutally loud!! It has thankfully mellowed down now the paint has set! 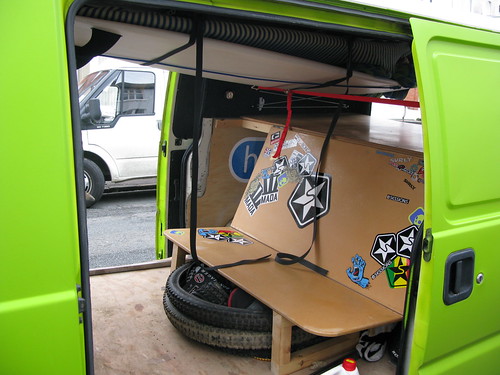
With the paint done the trim was refitted and the inside given a good clean up. The van is more or less finnished for the meantime. Mechanically it seems to be running sound and has passed its MOT with no issues so fingers crossed this one will last a bit longer than the last!!
Sunday, 28 September 2008
Surf/Bike Van Conversion
Subscribe to:
Posts (Atom)